 SURPRISE! 🙂
I’m posting these little beauties to make up for the fact that I have been away for so long…*sob*…….although, please don’t feel too sorry for me, I have been on my holidays! 🙂
After copious amounts of sunshine and frolicking in the warm waters of Israel and the not so warm waters of the Isle of Wight, we came back to a beautifully warm Leeds (for nearly 2 weeks!!) which was amazing but also meant that it was just too hot to bake in our tiny one-bedroomed shoe box that we call our home!
This week the weather has cooled and I have been able to get my bake on once again, it makes me happy 🙂
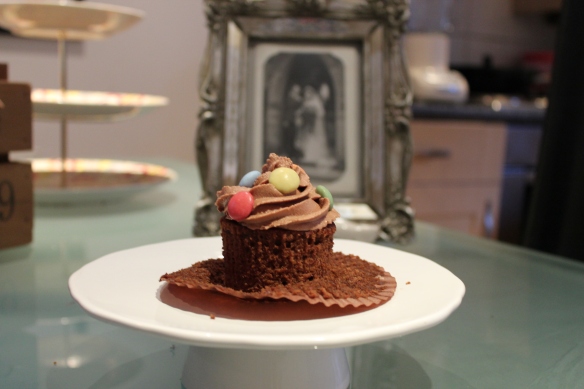
These are incredibly chocolatey, they feel like a really indulgent treat…definitely the best chocolate cupcakes I’ve ever made – I will undoubtedly be sticking with this recipe! It’s a Hummingbird one, so not to be sniffed at!
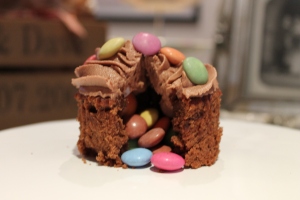
The trick with these is to add the smarties only an hour or so before serving. As the cupcakes are so rich and moist, adding the smarties any earlier will mean they go soft and start to lose their colour, especially after they have been iced.
See below for ingredients and recipe and enjoy 🙂 Let me know what you think! 🙂

Ingredients:
For the cake:
100g Plain flour
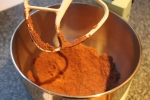
20g Cocoa powder
140g Caster sugar
1 1/2 Teaspoons baking powder
A pinch of salt
40g Unsalted butter (at room temp)
120ml Whole milk
1 Egg
1/4 Tsp Vanilla extract
For the Cupcake topping:
100g Good quality dark chocolate
100g Good quality milk chocolate
225g Unsalted butter (at room temp)
1 Tbsp Whole milk
1 Tsp Vanilla Extract
250g Icing sugar (sifted)
2 packets of smarties
Recipe:
(Makes 6 using a muffin tray)
1. Preheat your oven to 170c (325f) Gas 3
2. Put the flour, cocoa powder, sugar, baking powder, salt and butter in to your stand mixer with a paddle attachment (or a big enough bowl if using a hand mixer) and beat on a slow speed until you get a sandy consistency
3. Whisk the milk, egg and vanilla extract together in a jug and then slowly pour the about half in to the flour mixture. Beat to combine and turn the mixer up to high for a few minute to beat out any lumps


4. Turn the mixer down to a slower speed and slowly pour in the remaining milk mixture. Continue mixing for a few more minutes until the mixture is smooth
Top tip: Don’t over beat the mixture, it will result in a too heavy sponge
5. Spoon the mixture into the paper cases in your muffin tray until 2/3rds full and bake for 20-25 minutes
Top tip: Sometimes it can take slightly longer, keep checking every couple of mins after 20minutes. A skewer interred in the centre should come out clean
6. Leave the cupcakes to cool slightly in the muffin tray for around 15 minutes before turning out on to a wire rack to cool
7. To make the icing, melt the chocolate in a bowl over a pan of gently simmering water and stir every couple of minutes until you have a smooth, rich consistency. Leave to cool slightly


8. In a separate, large mixing bowl beat the butter, milk, vanilla extract & icing sugar until smooth – this can take several minutes using an electric hand mixer
9. Add the melted chocolate and beat again until thick and creamy – if it looks too runny, simply keep beating until you reach a suitable consistency


10. Using a sharp knife, cut a hole out of the middle of each cupcake, in an inverted cone type way
11. Pour in the smarties in to the holes of each cupcake and ice however you wish!


Enjoy!
Love S & P xx

 Healthy. Cookies.


